


Installation Steps
Manually rotate the valve to check for any abnormalities and ensure the valve is in the helt lukket posisjon.
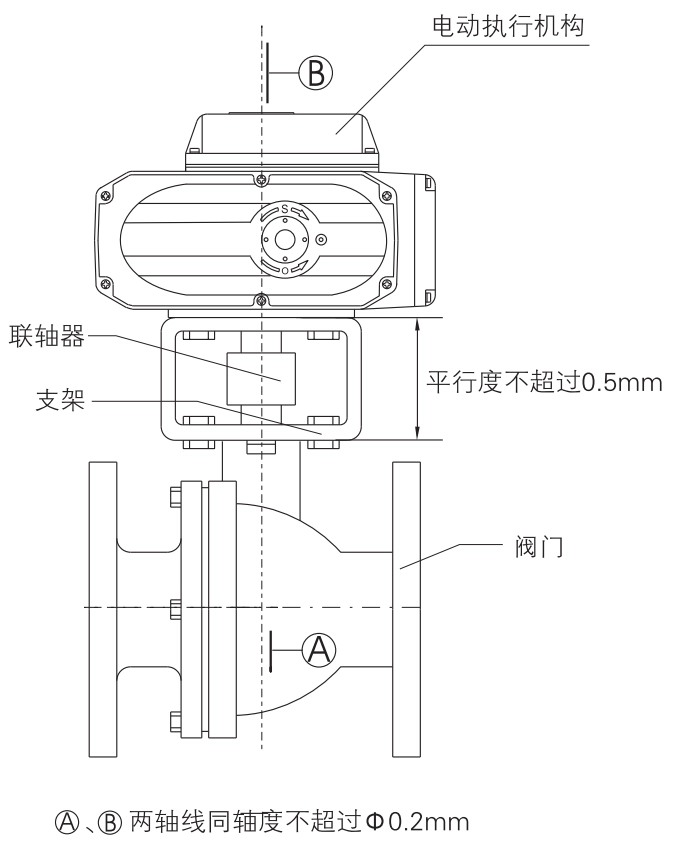
Secure the mounting bracket onto the valve.
Fit one end of the coupling onto the valve stem.
Manually drive the electric actuator to the fully closed position (pointer aligned with SHUT or zero-degree marking) and insert the actuator’s output shaft into the square hole of the coupling.
Tighten the bolts connecting the bracket, actuator, and valve body.
Manually operate the actuator through its full stroke to ensure smooth movement, no misalignment, and no eccentricity. Check if the valve can fully open and fully close within the actuator’s position indicator range.
⚠️ Merk: Avoid excessive force, as it may cause the actuator to overrun, leading to damage.
Important Notes for Custom Brackets and Couplings
For users who use custom-made brackets and couplings, please ensure the following:
Brackets and couplings should be designed and manufactured by qualified technical personnel and must comply with the required specifications.
The machining of the coupling’s shaft holes must be precise to minimize transmission backlash, preventing positioning errors during valve operation.
The alignment of the shaft holes must be strictly maintained, as misalignment may exceed the actuator’s designed operating range, making it impossible to properly adjust the stroke, which could result in valve malfunction.


 鄂公网安备 42018502006527号